Nginx Proxy Manager (NPM) Configuration
3. Nginx Proxy Manager (NPM)
In this chapter we configure external access to the services (Lightning Terminal, LNbits, Cashu, and Orchard) using Nginx Proxy Manager, which acts as a reverse proxy and SSL certificate manager.
Initial Access
Initial access to the Nginx Proxy Manager (NPM) container is done via HTTP using port 81. In our example, we will access it via the URL http://npm.cashu4community.xyz:81. In the following step, we will modify this configuration to avoid security risks.
The container is preconfigured, so user creation is not required on first startup.
Image 1: Nginx Proxy Manager login page.
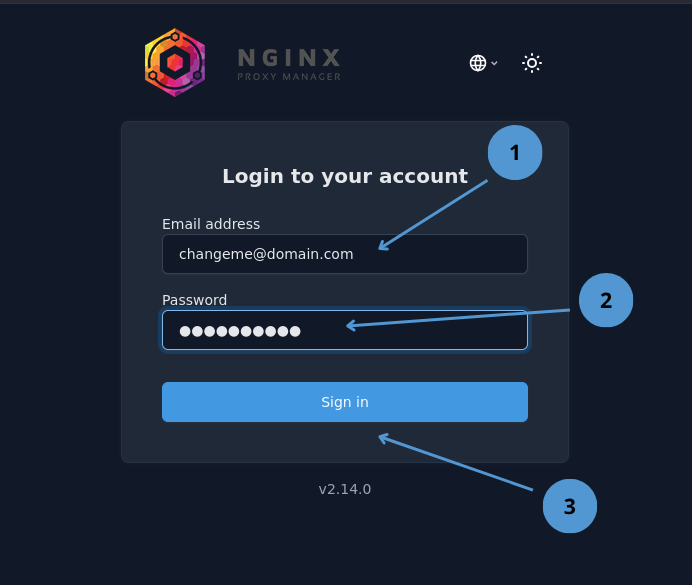
- User
changeme@domain.com - Password
ch4ng3m3*- - We press
Enteror clickSign in
After logging in, we access the NPM service dashboard.
Image 2: NPM Dashboard.
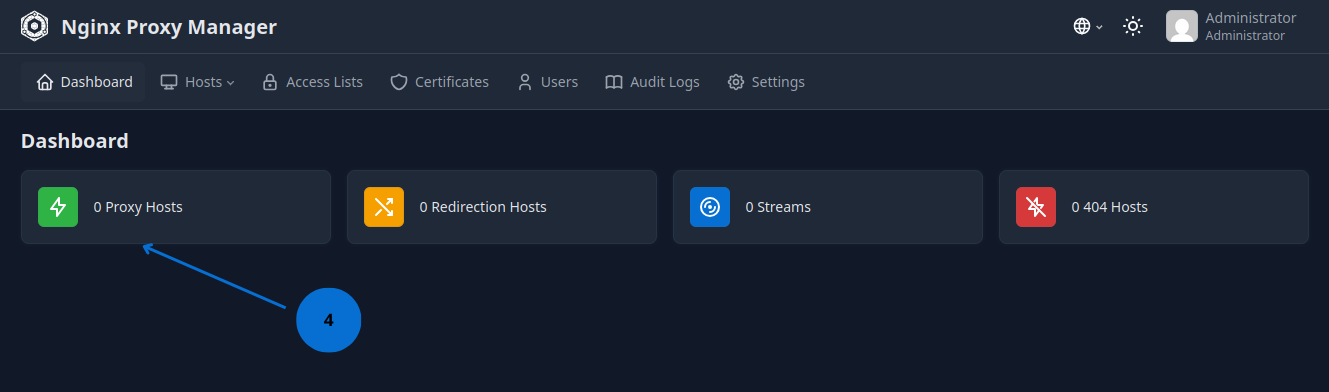
- We enter the Proxy Host panel.
3.1 Creating a Proxy Host for NPM
As we can see, access to NPM is done via HTTP (insecure protocol) and through port 81, which leaves our service vulnerable to attacks. To solve this, we will create a Proxy Host for NPM itself so we can operate over HTTPS.
Image 3: Adding a Proxy Host.
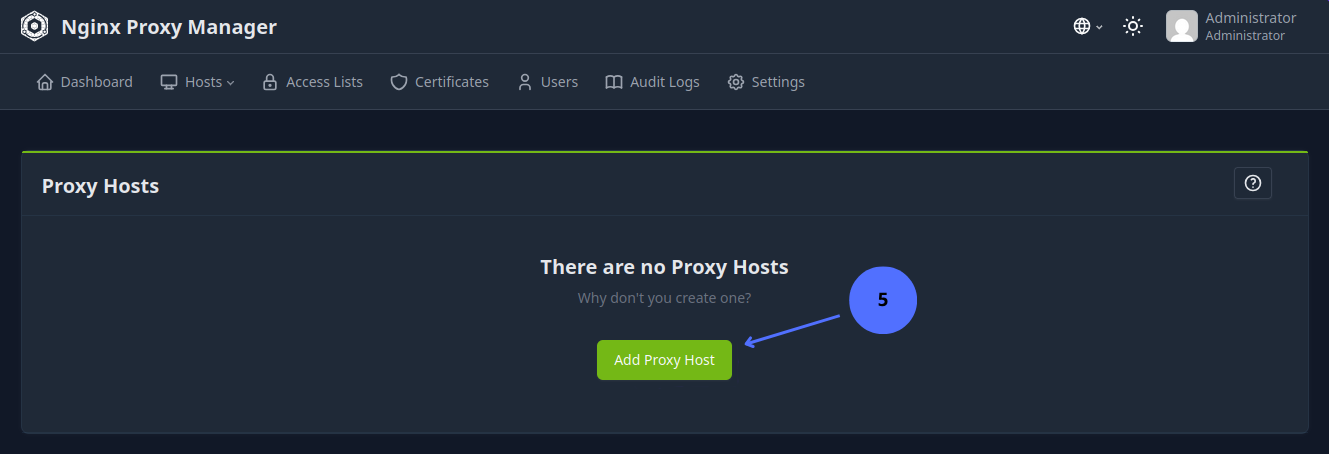
- We add a Proxy Host.
Image 4: Proxy Host Options.
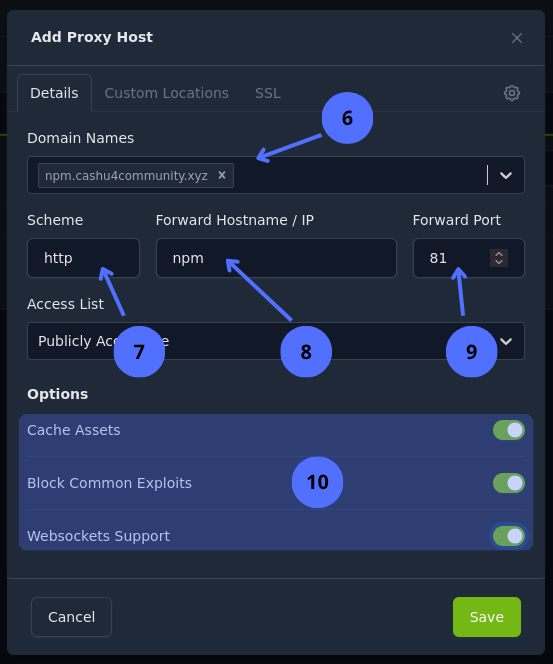
Domain Names: Enter the domain name that the application will use facing the internet. Since we are configuring access to NPM, we will use the domainnpm.cashu4community.xyz.Scheme: The scheme is the protocol used by NPM to communicate with the application running in the container; it can be http or https. For NPM we leave it as http.Forward Hostname / IP: This is the hostname; since it is a Docker container, it is best to use the service name. As we are configuring NPM, we will use npm. The complete list of services can be found at the end of the First Steps chapter.Forward Port: This is the port the application runs on internally in the Docker container. NPM uses port 81. The port list can be found at the end of this chapter.Options: We enable all options to improve application security and functionality.
Image 5: Proxy Host SSL Options.
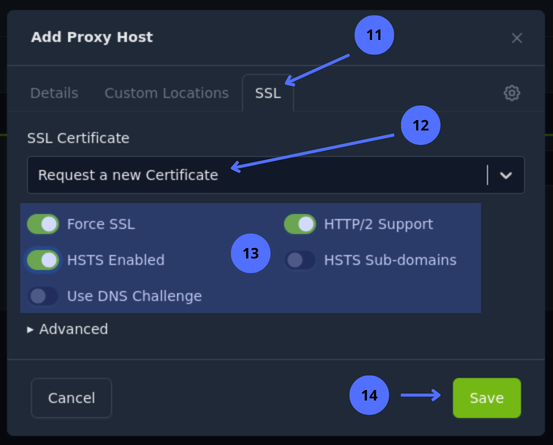
- We go to the SSL tab.
- We select
Request a new Certificatefrom the dropdown menu. - We enable the
Force SSL,HTTP/2 Support, andHSTS Enabledoptions. - We save the changes.
After saving the changes, we can see the NPM record in the Proxy Host panel.
Image 6: NPM service record in the Proxy Host panel.
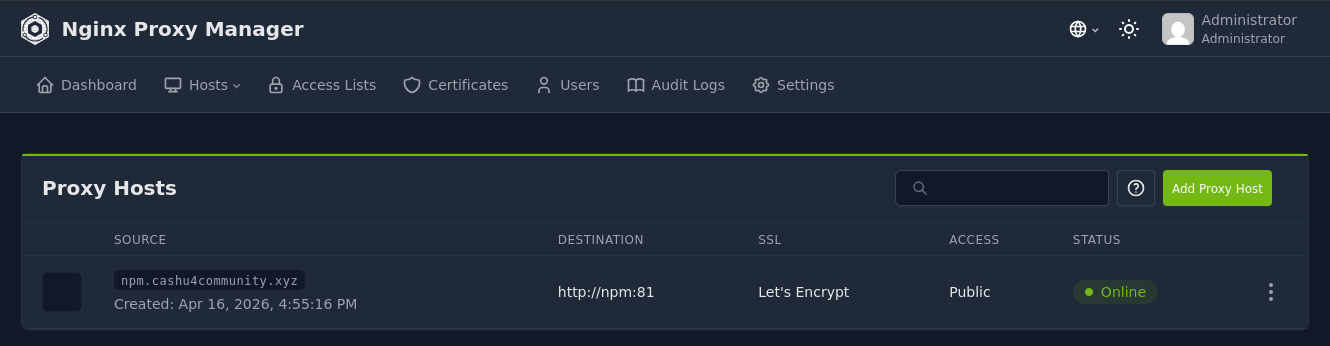
Image 7: Properly configured Proxy Host.
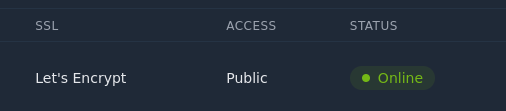
With NPM now configured to access securely via HTTPS, we log out and log back in to continue with the remaining configurations.
Image 8: Logout User Menu.
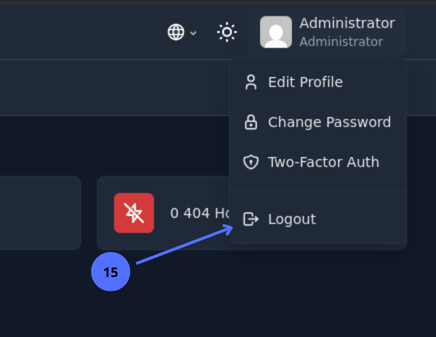
- We log out.
3.2 List of Services to Configure in NPM
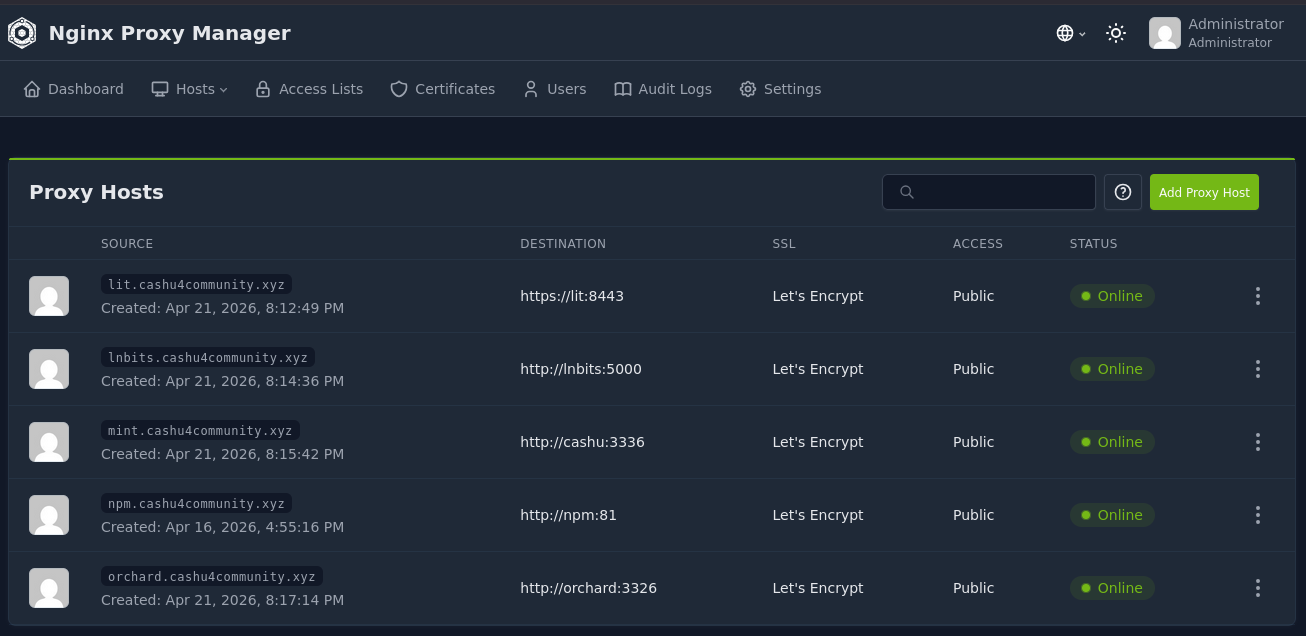
The following table shows the services to configure in NPM, as well as all the parameters needed. We will use the domain cashu4community.xyz as a reference; each user should adapt it to their own domain.
| Domain Name | Scheme | Docker Service | Port |
|---|---|---|---|
| npm.cashu4community.xyz | http | npm | 81 |
| lit.cashu4community.xyz | https | lit | 8443 |
| lnbits.cashu4community.xyz | http | lnbits | 5000 |
| mint.cashu4community.xyz | http | cashu | 3336 |
| orchard.cashu4community.xyz | http | orchard | 3326 |
Once we register all Proxy Hosts, it would look something like this:
Image 9: List of Infrastructure services in NPM.
3.3 Updating Access Account Data
As mentioned at the beginning of this chapter, the NPM service comes preconfigured with a generic user account. To avoid unwanted access to our infrastructure, it is mandatory to change this account. To do so, we access the user menu.
Image 10: User Menu Edit Profile.
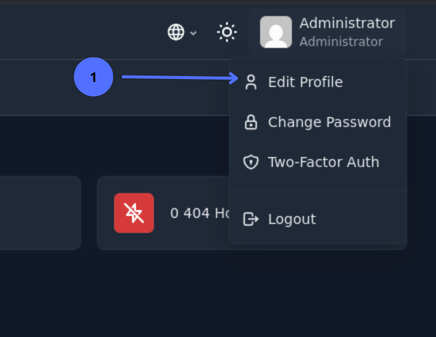
- We click
Edit Profileto change the email address we use to log in.
Image 11: Changing username and email.
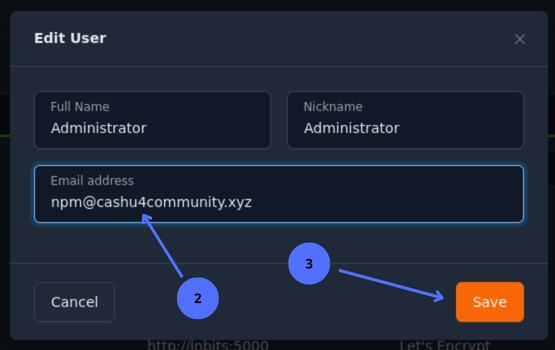
- We update the
Email addressfield with our email. - We save the changes.
Image 12: User menu change password.
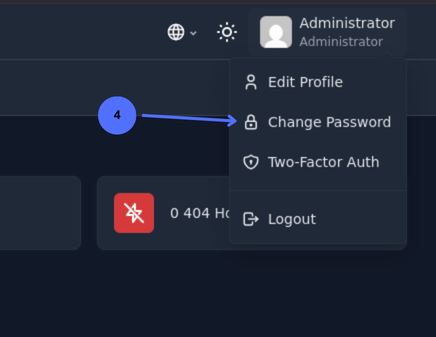
- We click
Change Passwordto change the current password.
Image 13: Changing the current user's password.
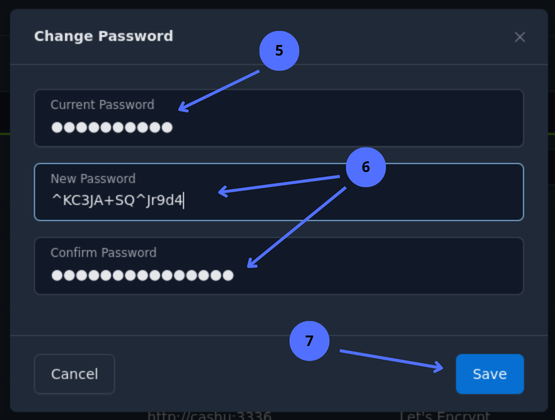
- We enter the current password.
- We enter the new password and confirm it.
- We save the changes.
Image 14: User menu two-factor authentication.
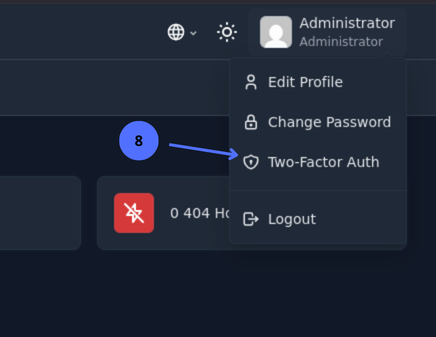
- We click
Two-Factor Auth(recommended for an additional layer of security).
Image 15: Enabling 2FA in the NPM system.
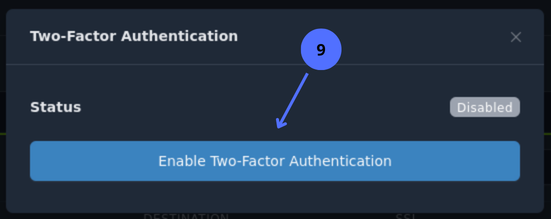
- We click the button to enable two-factor authentication.
Image 16: Enabling 2FA via QR with verification code.
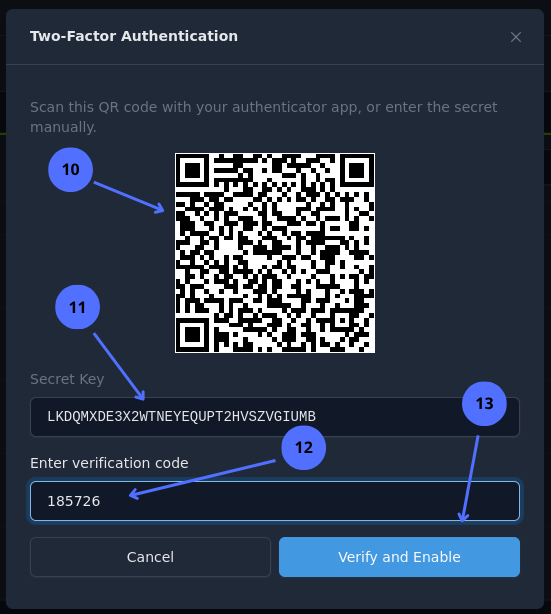
- We scan the QR with the 2FA Authenticator app. We can also use others like Authy.
- If scanning the QR is not possible, we copy the code directly into the 2FA app.
- We paste the 6-digit code generated by the 2FA app.
- We verify.
If verification fails, it may be because the 6-digit code expired; we can try again. The next step will show us the recovery codes necessary in case we lose the 2FA code or the app gets uninstalled.
Image 17: 2FA recovery codes.
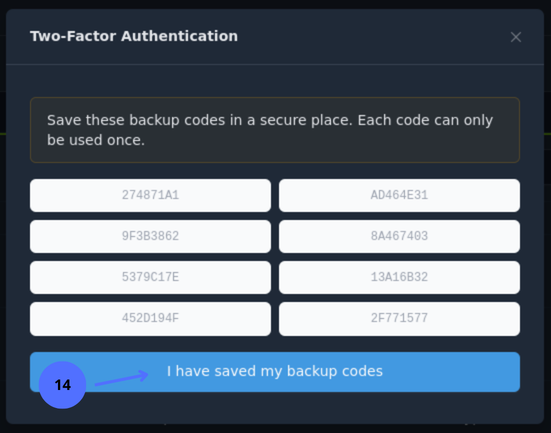
- We copy the recovery codes and confirm.
Image 18: 2FA options.
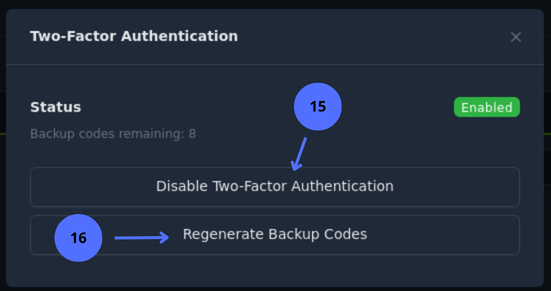
- We click here if we want to disable 2FA.
- We click here if we want new recovery codes.
3.4 Removing Access to NPM via Port 81
We have now confirmed secure access to NPM and updated the admin account credentials. Now we disable access to NPM via port 81. To do this, we edit the docker-compose.yml file located in cashu4cs-deploy.
nano docker-compose.ymlWe look for the NPM service that begins with the line npm: and we remove the line - '81:81' from ports:
 npm:
    image: jc21/nginx-proxy-manager:latest
    container_name: nginx_proxy_manager
    restart: unless-stopped
    ports:
      - '80:80'
      - '443:443'
      - '81:81'
    environment:
      - DB_SQLITE_FILE:"/data/database.sqlite"
      - DISABLE_IPV6:'true'
    volumes:
      - ./app-data/npm/data:/data
      - ./app-data/npm/letsencrypt:/etc/letsencrypt
NPM service without port 81.
 npm:
    image: jc21/nginx-proxy-manager:latest
    container_name: nginx_proxy_manager
    restart: unless-stopped
    ports:
      - '80:80'
      - '443:443'
    environment:
      - DB_SQLITE_FILE:"/data/database.sqlite"
      - DISABLE_IPV6:'true'
    volumes:
      - ./app-data/npm/data:/data
      - ./app-data/npm/letsencrypt:/etc/letsencrypt
We save and exit the file ctrl+s and ctrl+x
Finally, we recreate the NPM service container for the changes to take effect:
docker-compose up --force-recreate npm -d