First Steps
1. First Steps
In this chapter we prepare the base environment on which the entire infrastructure will be built. Before running any command, we verify that we have the following requirements:
1.1 Requirements
- VPS server with Debian/Ubuntu operating system (available at a discount through the following Hostinger links: VPS KVM1 and VPS KVM2, we recommend KVM2 for production).
- Docker 26.0+.
- Docker Compose 2.0+.
- Valid DNS domain to publish services on the Internet (available at Namecheap, Hostinger, or GoDaddy; Namecheap and Hostinger accept Bitcoin payments).
1.2 Infrastructure Schema
Image 1: Docker infrastructure architecture.
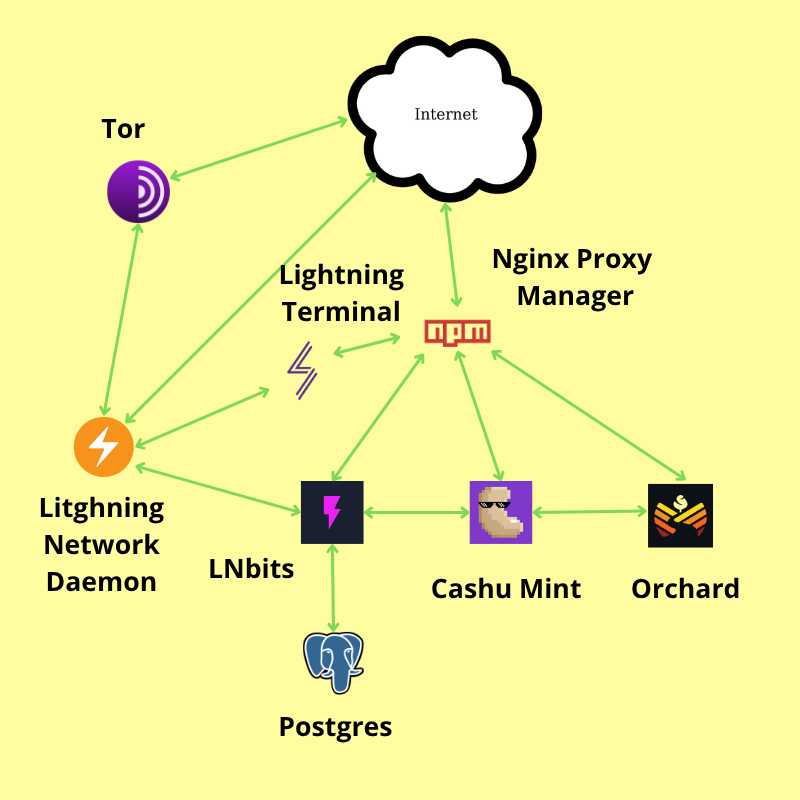
Description: The schema shows the Docker containers (Tor, Lightning Network Daemon, Lightning Terminal, LNbits, Postgres, Cashu, Orchard, and Nginx Proxy Manager). Arrows indicate communication between services.
1.3 Installing Requirements
1.3.1 Installing Docker and Docker Compose
Most VPS providers grant direct root access by default. If this is the case, we omit the use of sudo in all commands. To confirm the current user, we run:
whoamiIf the output of the command is root, sudo is not required before the following commands:
sudo apt update && sudo apt upgrade
# Debian 12+
sudo apt install docker.io docker-compose
# Ubuntu 24.04+
sudo apt install docker.io docker-compose-v2
1.3.2 Adding Our User to the Docker Group
If the output of the whoami command we ran earlier was root, we skip this step; otherwise, we run the following command:
sudo usermod -aG docker $(whoami)This allows us to run the docker command without elevated privileges.
1.3.3 Cloning the Project Repository
git clone https://github.com/cashu4community/cashu4cs-deploy.git
cd cashu4cs-deploycashu4cs-deploy directory.
1.4 Initial Configuration
To start the infrastructure, we need to configure several parameters. We recommend saving them in a document, as they will be needed in the following sections of this chapter.
1.4.1 Configuring Lightning Network Daemon Parameters
Changing the Public IP of the Lightning Node
To get the public IP we will use the script get_public_ip.sh located in the root of the cashu4cs-deploy directory.
./get_public_ip.shThis returns an output like the following:
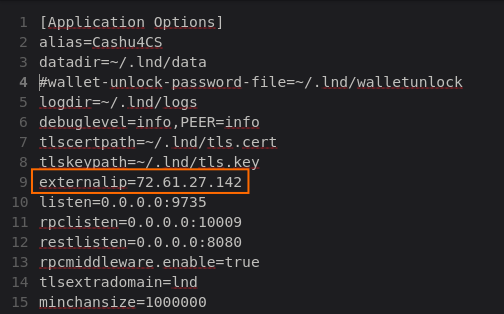
72.61.27.142With this IP, we edit the lnd.conf file.
nano app-data/lnd/lnd.confWe look for the line externalip= and add the obtained IP 72.61.27.142.
Image 2: lnd.conf file parameter externalip=.
We save and exit the file ctrl+s and ctrl+x
Changing the LND Node Alias
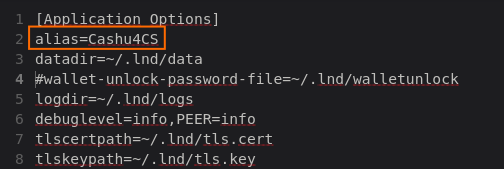
The alias is useful to find the node in Lightning network explorers like mempool.space or amber.space. To change it, we edit the lnd.conf file again and look for the line alias=; for this chapter we will use Cashu4CS as the LND node alias.
Image 3: lnd.conf file parameter alias=.
Creating the Password for the LND Node Wallet
The LND node wallet creation process we will see later asks for a password used to encrypt the wallet and unlock it every time the service restarts. It must be at least 12 characters long and combine uppercase and lowercase letters, numbers, and special characters (for example: *-+). Once created, we enter the password in the walletunlock file located in app-data/lnd/.
For this tutorial we will use +6Mn31qVwLC- as the wallet password.
nano app-data/lnd/walletunlockImage 4: walletunlock file with the password created above.

We save and exit the file ctrl+s and ctrl+x
walletunlock file allows us to automatically unlock the node wallet after a Docker container restart. This is the reason why it contains the password.
1.4.2 Creating the Password for Lightning Terminal Access
To access the Lightning Terminal service (from now on LIT), a password is required. It must meet the same complexity requirements as the one used for the LND wallet. Once generated, we save it in the lit.conf file located in app-data/lit/.
Once the password is created, we edit the lit.conf file.
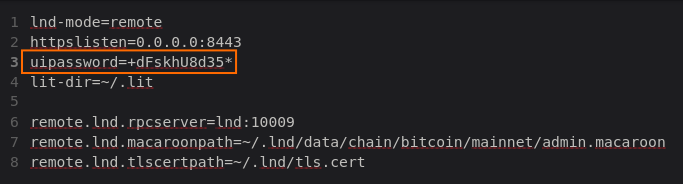
nano app-data/lit/lit.confWe look for the line uipassword= and enter the password. We will use +dFskhU8d35* as an example for the tutorial, resulting in:
Image 5: lit.conf file with the password created to access the LIT web interface.
We save and exit the file ctrl+s and ctrl+x
1.4.3 Setting LNbits Configuration Parameters
The LNbits service needs the AUTH_SECRET_KEY defined in the .env file and the PostgreSQL database password to function.
Generating the AUTH_SECRET_KEY
openssl rand -hex 32This returns something like:
f92a03c2e12362f092b6589bde08b0433cd08f4ffe9ef894fe8e01660d18054fWe copy the key and edit the .env file located in app-data/lnbits/.
nano app-data/lnbits/.envWe look for the line AUTH_SECRET_KEY and paste the key generated in the previous step.
Image 6: .env file with the AUTH_SECRET_KEY created above.

We save and exit the file ctrl+s and ctrl+x
Creating the PostgreSQL Database Password
Now we need to create the password that LNbits will use to connect to the PostgreSQL database. We will enter it in the .env file we edited earlier and in the docker-compose.yml file located in the root of the cashu4cs-deploy directory.
We edit the .env file.
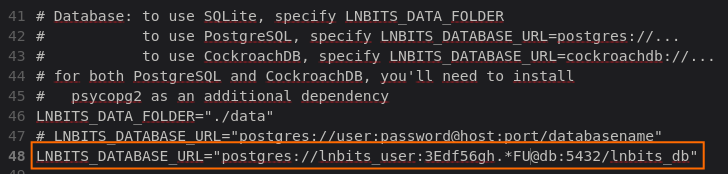
nano app-data/lnbits/.envWe look for the line LNBITS_DATABASE_URL="postgres://lnbits_user:dbpassword_@db:5432/lnbits_db" and replace dbpassword_ with our password. We will use 3Edf56gh.*FU as an example.
Image 7: Variable LNBITS_DATABASE_URL for database connection using the password generated above.
We save and exit the file ctrl+s and ctrl+x
Now we edit the docker-compose.yml file.
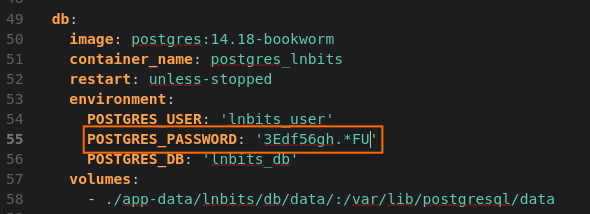
nano docker-compose.ymlWe look for the docker service db: and edit the POSTGRES_PASSWORD variable in the environment: section, resulting in:
Image 8: POSTGRES_PASSWORD variable updated with the generated password.
We save and exit the file ctrl+s and ctrl+x
1.4.4 Setting Cashu Mint Configuration Parameters
For the Cashu Mint to function properly, we must generate the MINT_PRIVATE_KEY= variable and the SSL certificates used to encrypt the RPC connection from the Orchard service to the Mint.
Creating the MINT_PRIVATE_KEY Variable
openssl rand -hex 32This returns something like:
cf33ffb9af447b1210e052548f911ba62639a6a653f7066809bacecb7436ea4bJust as we did with LNbits' AUTH_SECRET_KEY, we copy the key above and edit the .env file located in app-data/cashu/.
nano app-data/cashu/.envWe look for the line MINT_PRIVATE_KEY= and paste the key generated in the previous step:
Image 9: MINT_PRIVATE_KEY variable updated in the .env file.

We save and exit the file ctrl+s and ctrl+x
Generating SSL Certificates for the RPC Connection
We go to the certs directory located in app-data/cashu/
cd app-data/cashu/certsWe run the script generate_certificates.sh
./generate_certificates.shThis script generates all the necessary certificates for the RPC connection. If no error occurred, the certificates are in this directory.
ls .
ca_cert.pem  ca_private.pem  client_cert.pem  client_private.pem  generate_certificates.sh  server_cert.pem  server_private.pem
1.4.5 Setting Orchard Configuration Parameters
We need to generate the SETUP_KEY used in the Orchard initialization.
openssl rand -hex 16The result would be:
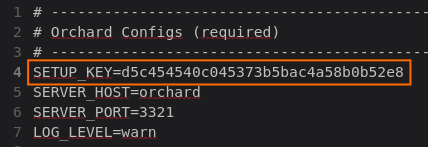
d5c454540c045373b5bac4a58b0b52e8We copy the key above and edit the .env file located in app-data/orchard/.
nano app-data/orchard/.envWe look for the line SETUP_KEY= and paste the key generated in the previous step.
Image 10: SETUP_KEY variable updated in the .env file.
We save and exit the file ctrl+s and ctrl+x
1.5 Service Management
| Command | Action |
|---|---|
docker-compose up -d |
Starts the complete infrastructure; downloads images on first execution. |
docker-compose down |
Stops all services in a controlled manner and removes containers. |
docker-compose up --force-recreate [service] -d |
Rebuilds a specific container after making changes to its configuration. |
docker-compose start [service] |
Starts the container. |
docker-compose stop [service] |
Stops a container. |
1.5.1 Service Names
Below are the names of the infrastructure services, useful for running the start, stop, or rebuild commands from the table above.
- Financial:
lnd,cashu(Mint),lnbits. - Management and Network:
lit(Lightning Terminal),npm(Proxy Manager),tor,orchard. - Persistence:
db(PostgreSQL),redis.
1.6 Starting the Infrastructure
To start the infrastructure, we run:
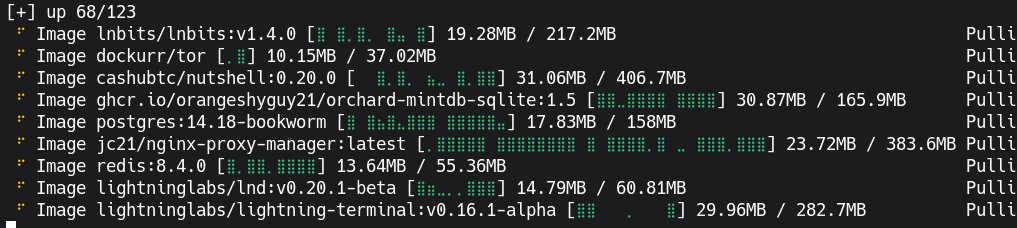
docker-compose up -dThe first time this command is executed, the service docker images are downloaded.
Image 11: Downloading images during the startup process.
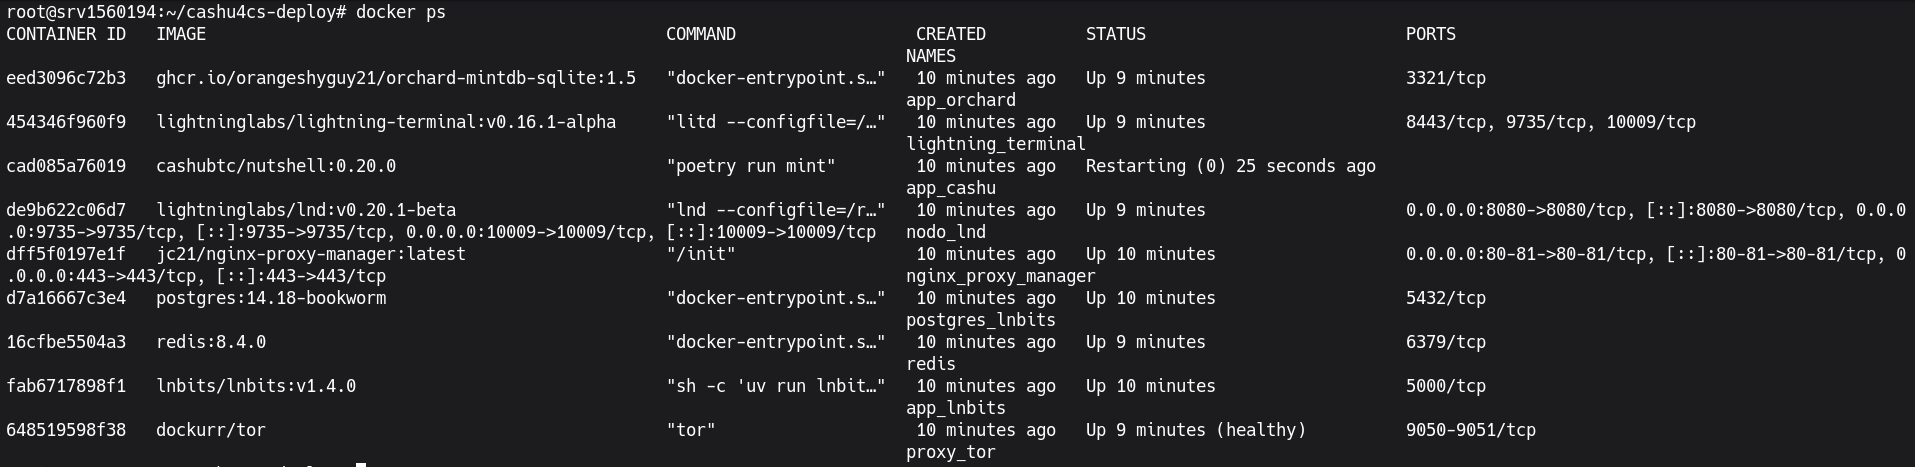
If the previous step completed without issues, we verify the container status by running:
docker psThis shows the running containers.
Image 12: List of running containers.